TianGong LCA MCP (Local)
Visit the TianGong MCP Hub for the latest plug-in samples, configuration scripts, and FAQs. This page summarises the key steps for local deployment.
OpenLCA Configuration
OpenLCA Installation
At the openLCA official website, follow the page instructions to download the openLCA software to your local machine.
File Import
Click the software icon to enter the downloaded openLCA interface and begin file import.
-
Menu Expansion: Click the "File" menu in the upper left corner to expand the dropdown list.
-
Select Import: In the menu, click the "Import" option to prepare for importing data files.
-
Import File: In the "Import" submenu, select "File" or "Other" based on the actual data format.
Import Option Purpose Common Supported Formats/Types File Import complete databases or standard dataset files. .zolca,EcoSpold,ILCD,SimaPro CSV,ExcelOther Import specific components or perform advanced import configuration. Import entire databases, specific components (processes, flows, methods, etc.), GeoJSON, mapping files -
Browse Data: After import completion, expand and view data in the main interface navigation bar.

IPC Server
-
Menu Expansion: Click the "Tools" menu in the upper left corner to expand the dropdown list.
-
Tool Selection: In the menu, click the "Developer tools" option.
-
Open Configuration Panel: In the "Developer tools" submenu, select "IPC Server".
-
Port Configuration: Navigate to the "Start an IPC Server" interface, fill in the IPC Server startup port in the Port field (recommended: 8080).
-
Service Startup: Click the green button to start the IPC Server.

MCP Server
NVM Installation
Depending on your system type, download nvm to your local machine from the corresponding official website (Windows, Linux, macOS) following the documentation.
Node.js Package
Open the corresponding terminal based on your computer's system (Windows/Linux/Mac) and enter the appropriate commands following the instructions below
-
Node.js Download/Activation
# Install Node.js version 22
nvm install 22
# Configure the Node.js version to use
nvm use 22 -
MCP-Server Package Installation
# Install package
npm install -g @tiangong-lca/mcp-server@0.0.14 -
MCP-Server Startup
# Start MCP-Server
npx -p @tiangong-lca/mcp-server tiangong-lca-mcp-http-local
MCP Server Invocation
Inspector
MCP Inspector Launch: Enter the following command in the terminal, which will automatically redirect to the Inspector page
npx @modelcontextprotocol/inspector
-
Transport Type Configuration: On the Inspector page, click the dropdown box and select Streamable HTTP.
-
URL Configuration: Fill in the MCP Server port http://localhost:9278/mcp.
-
Server Connection: Click connect to establish connection.
After successful page connection, the following demonstrates the application method using environmental impact assessment as an example.
-
Operation Selection: Click the Tools button on the top toolbar of the page.
-
List Expansion: Click the List Tools button to display the dropdown list.
-
Tool Selection: Click the OpenLCA_Impact_Assessment_Tool button.
-
UUID Configuration: Find the UUID corresponding to productSystem and impactMethod in openLCA and enter them in the corresponding boxes.
-
Tool Execution: Click Run Tool to execute the tool and display output.

Cherry Studio
At the Cherry Studio official website, follow the official documentation to download the software to your local machine and open it.
-
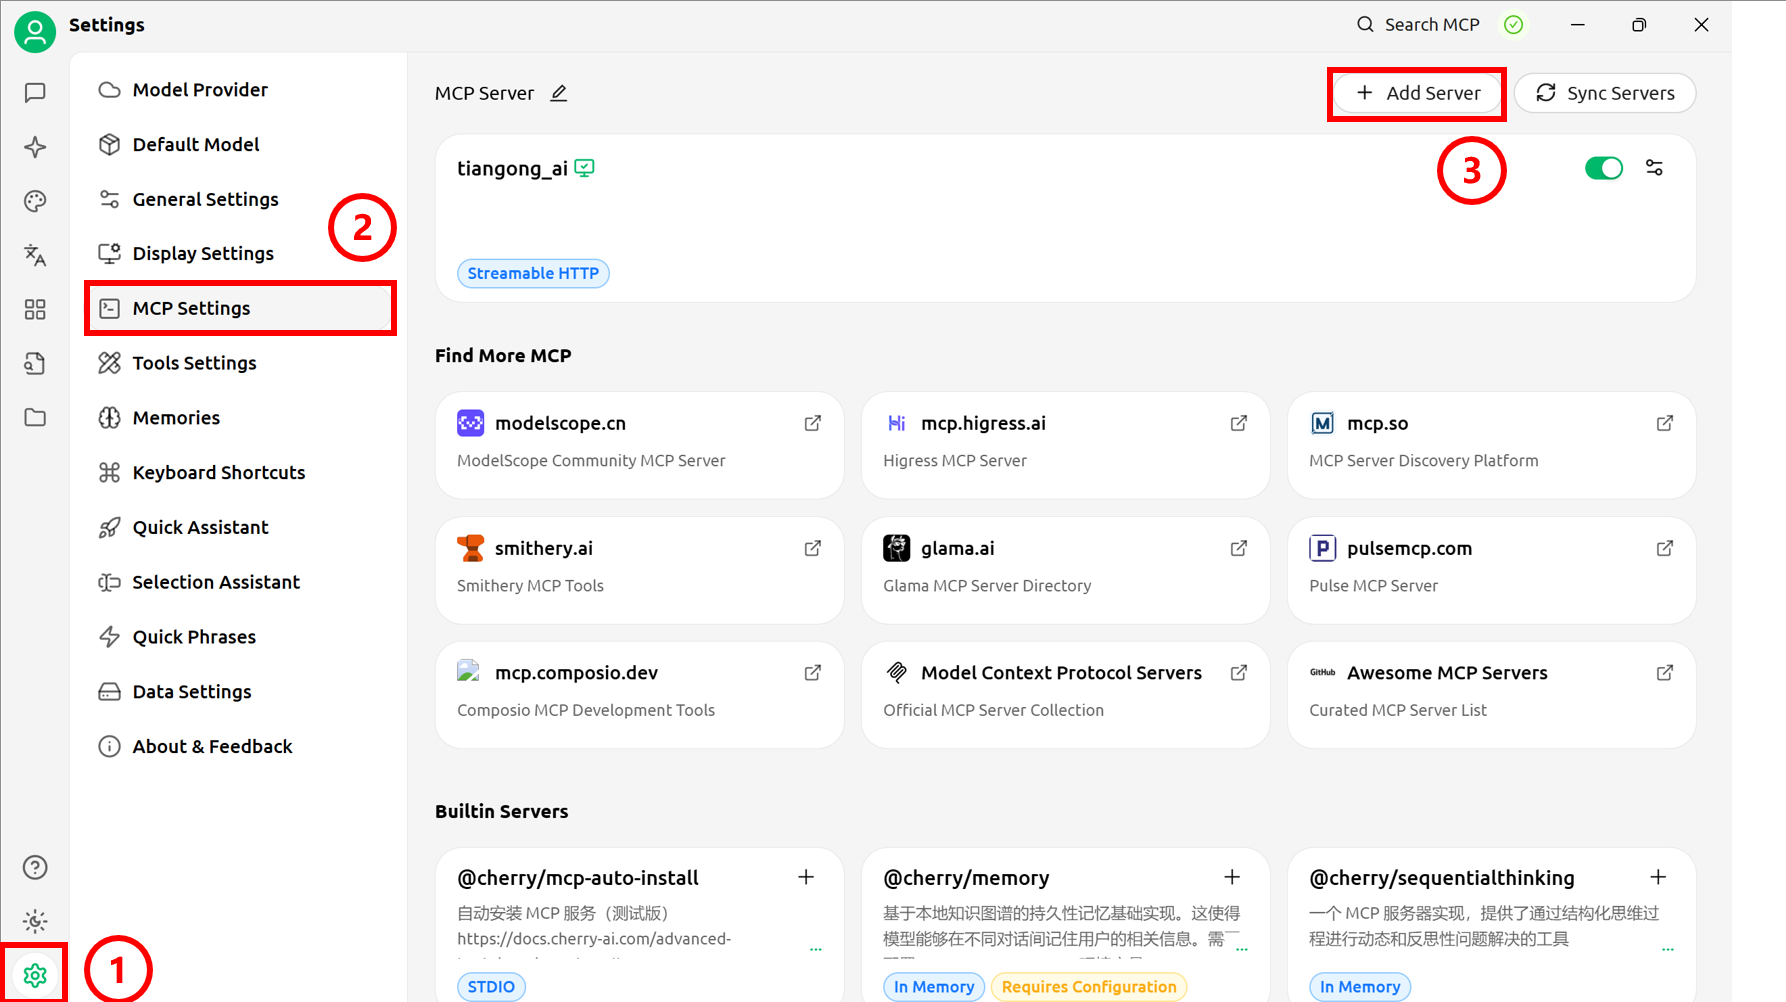
Open Settings Panel: Click the settings button in the sidebar to open the panel.
-
Open MCP Settings: Select MCP Settings to navigate to the MCP configuration interface.
-
Add MCP Server: Click the Add Server button in the upper right corner to navigate to the MCP Server configuration interface.
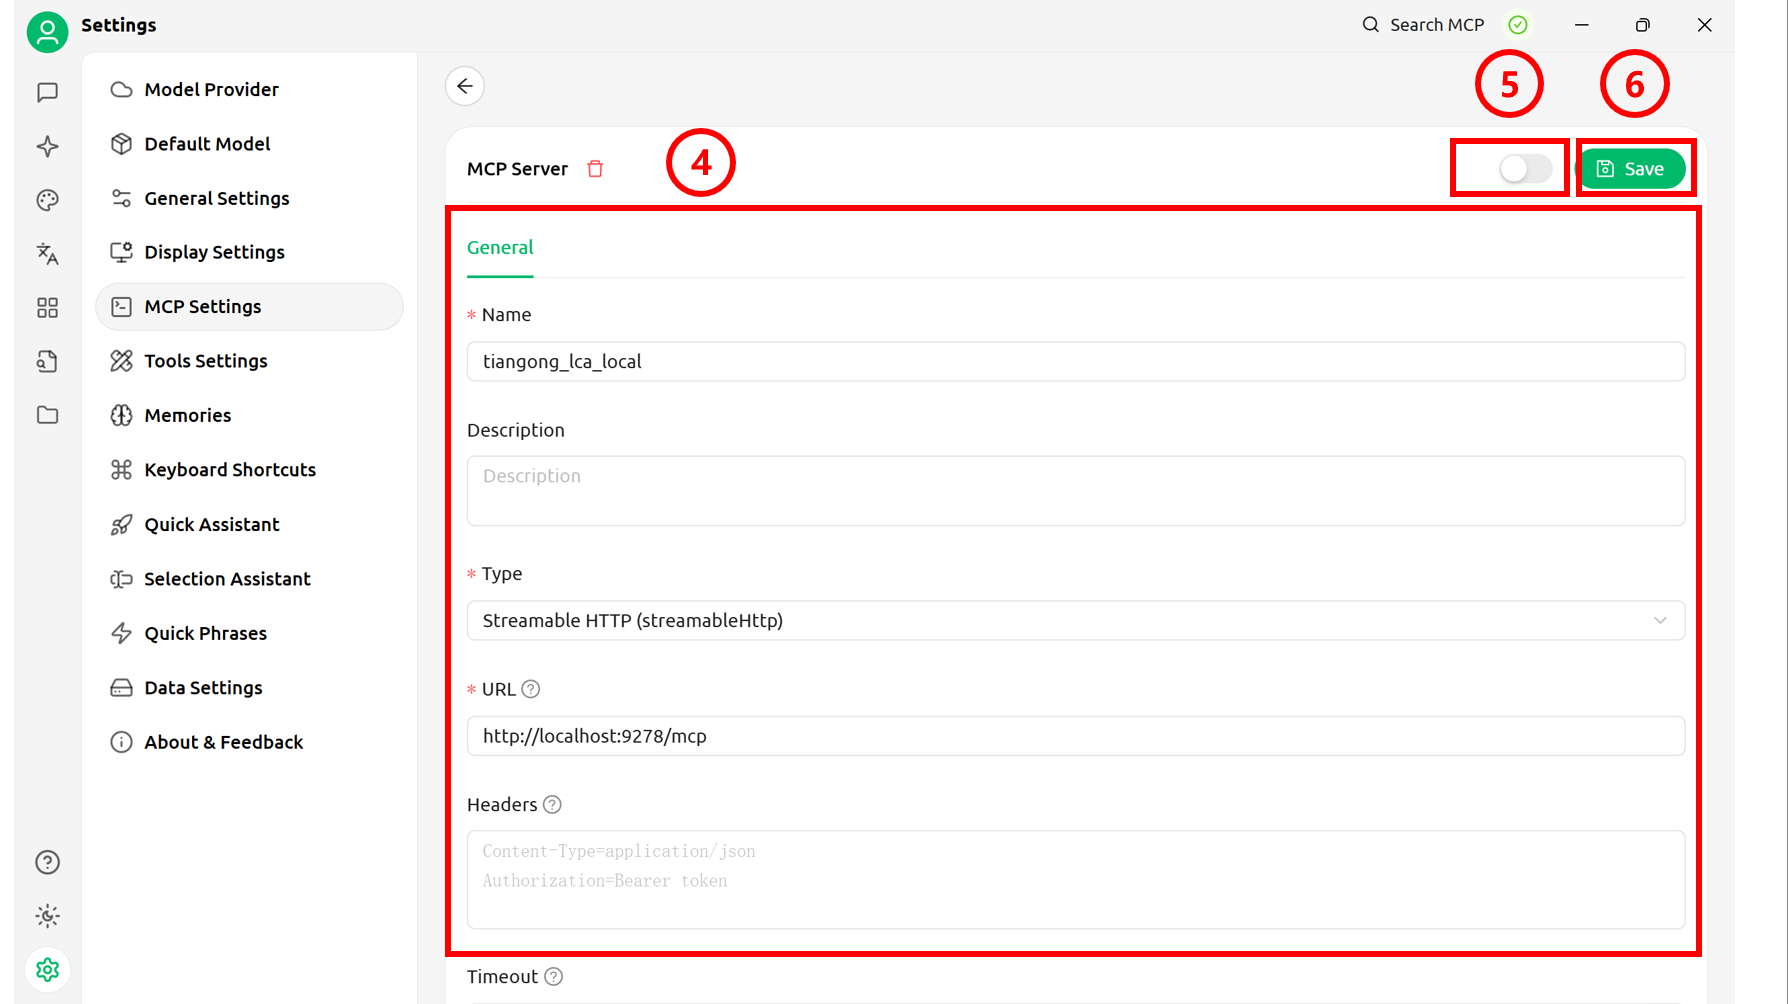
-
Information Filling: Configure basic information for the local MCP Server.
Type: Streamable HTTP
URL: http://localhost:9278/mcp -
Save Information: Click the "Save" button to save settings.
-
Start MCP Connection: Click to open the MCP Server.
-
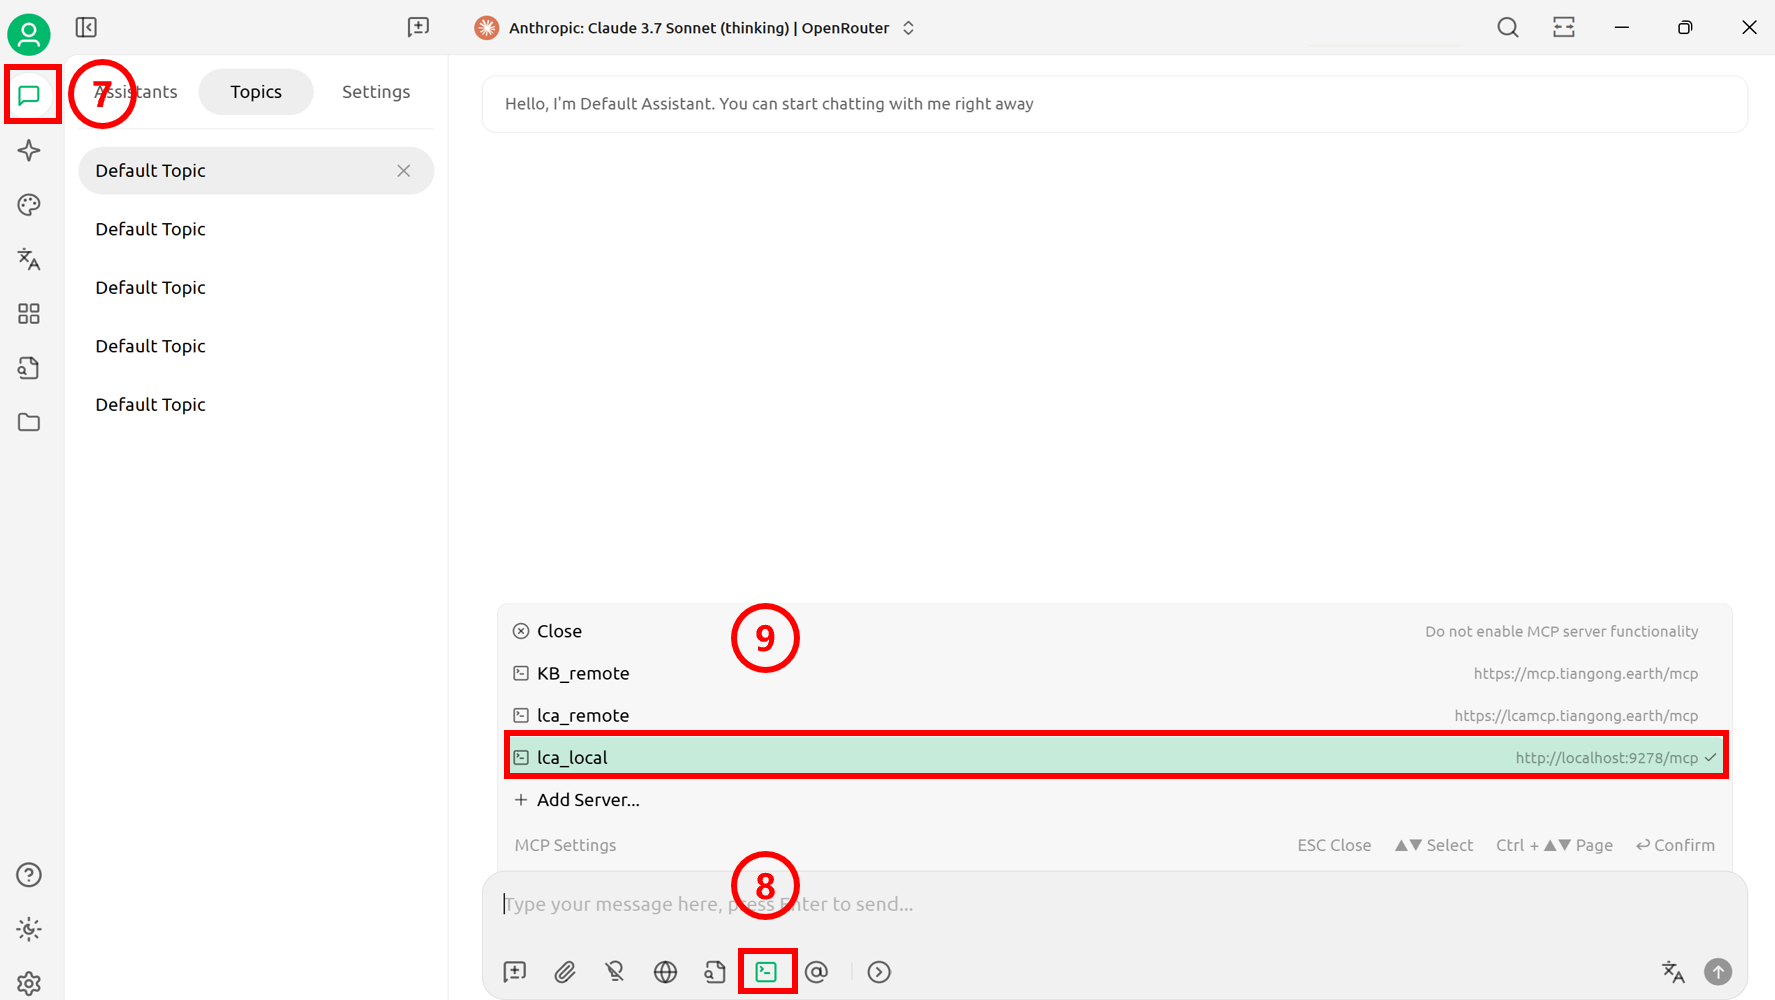
Open Chat Interface: Click the top button in the sidebar to return to the main page. Configure the model (refer to official documentation) and create a chat page.
-
Server Connection: Click the MCP Settings button below the conversation.
-
MCP Selection: Select the required MCP.
Dify
Based on the official Dify documentation, deploy it locally. After the deployment is complete and the project is running, perform the following steps.
-
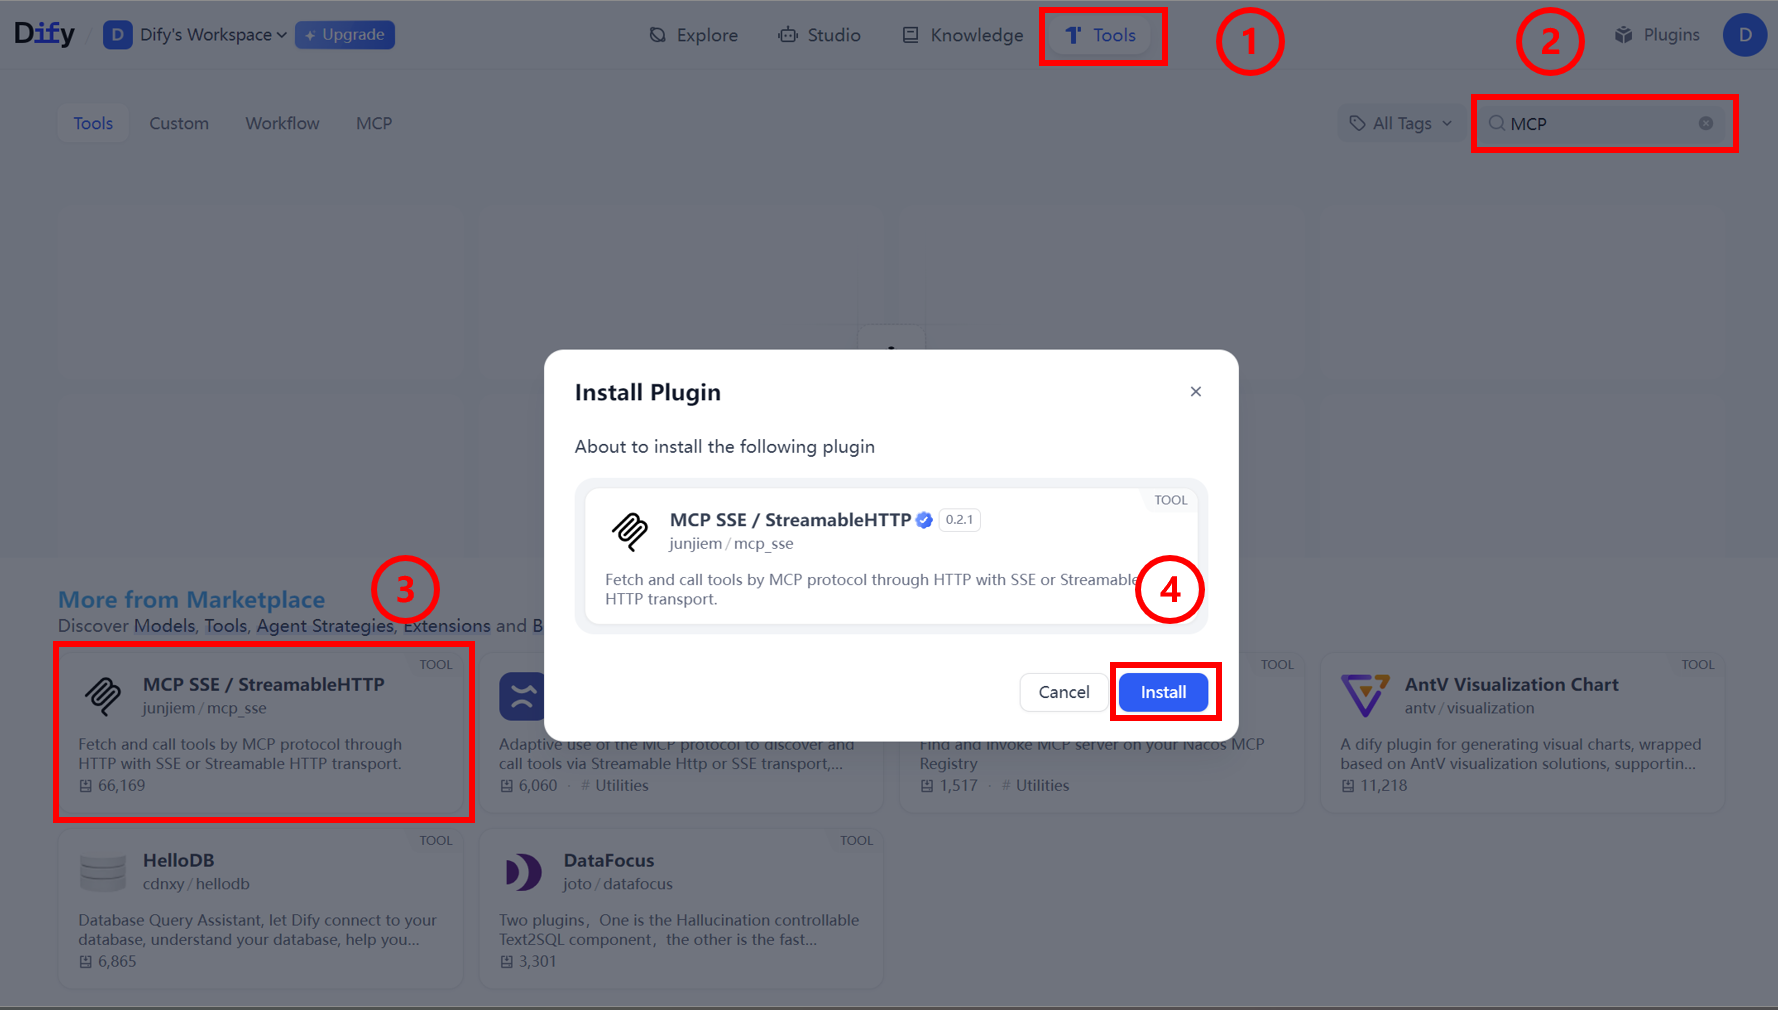
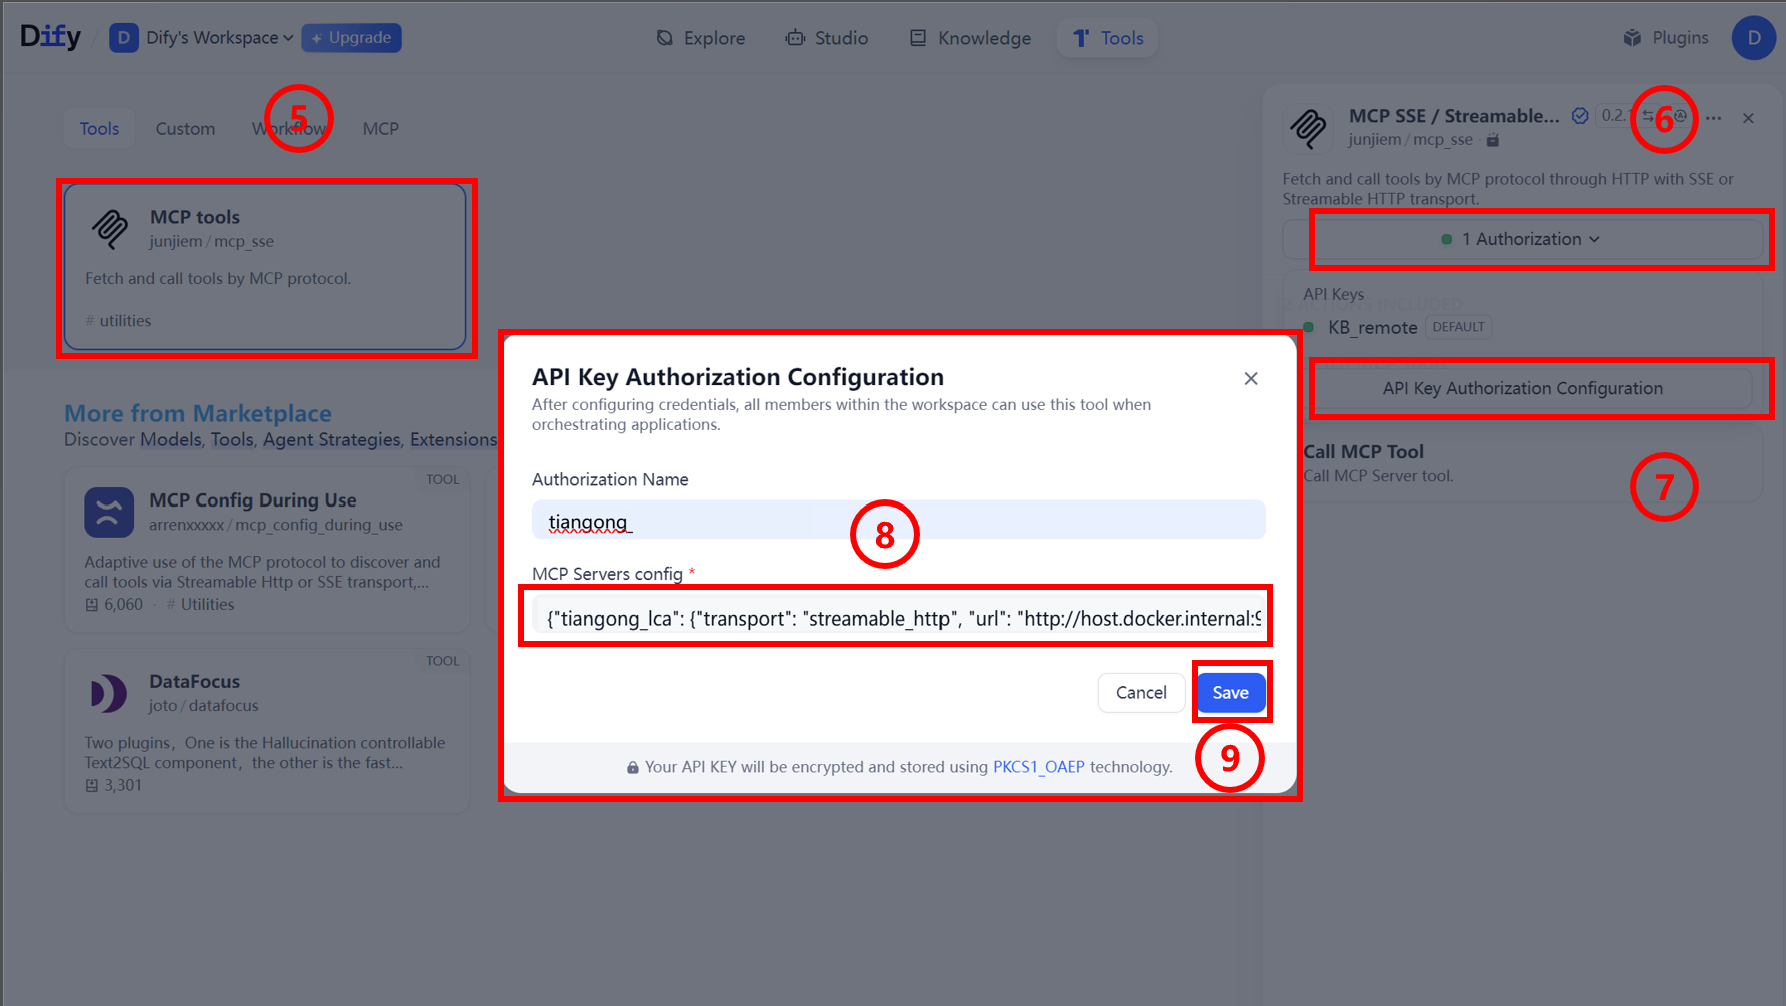
Tools Page Access: Click the "Tools" option in the top toolbar to navigate to the tool management page.
-
MCP Tool Search: Enter "MCP" keyword in the search bar to search.
-
Tool Market Download: Find and download the MCP tool in the Market place (the highlighted tool in the figure is the recommended tool).
-
Tool Installation Execution: Click the "Install" button to complete MCP tool installation.
-
Configuration Panel Opening: After MCP tool installation is complete, click the pop-up configuration panel.
-
Authorization Configuration Access: Click "Authorization" to configure MCP authorization.
-
Configuration Window Opening: Click to open the MCP detailed configuration window.
-
Basic Information Filling: Fill in necessary connection information in the configuration window.
{
  "tiangong_lca_local": {
    "transport": "streamable_http",
    "url": "http://host.docker.internal:9278/mcp",
    "headers": {
      "Accept": "application/json,text/event-stream",
    },
    "timeout": 50,
    "sse_read_timeout": 50
  }
} -
Configuration Information Saving: Click the "Save" button after completing the form.
-
Workflow Construction: Build workflows or agents in Dify to invoke MCP.
- For creating agents and workflows, refer to official documentation.
- For MCP applications, refer to official documentation